
16 Oct 2025
Freediving Equipment Guide
What You Really Need (and How to Choose It)
So you’ve taken a freediving course… Now what?
One of the most common questions when starting your freediving journey is: What gear do I need? I started with my old gear from my scuba diving days. A thick, tight wetsuit, short scuba fins, and a basic mask. I quickly learned that freediving gear is about efficiency and comfort.
But here’s the truth: the best freediving equipment in the world won’t make you a better diver, instead it can guide you on your path. Mastering the foundations of relaxation, technique and awareness, comes first. Comfort with your equipment supports that foundation, but skill and calmness build a safe path into deeper progression.
In this guide, we’ll look at the essential pieces of freediving equipment, what each one does, and what to look for when buying. Whether you’re training in the pool, starting your freediving journey, or refining your setup for deeper dives.
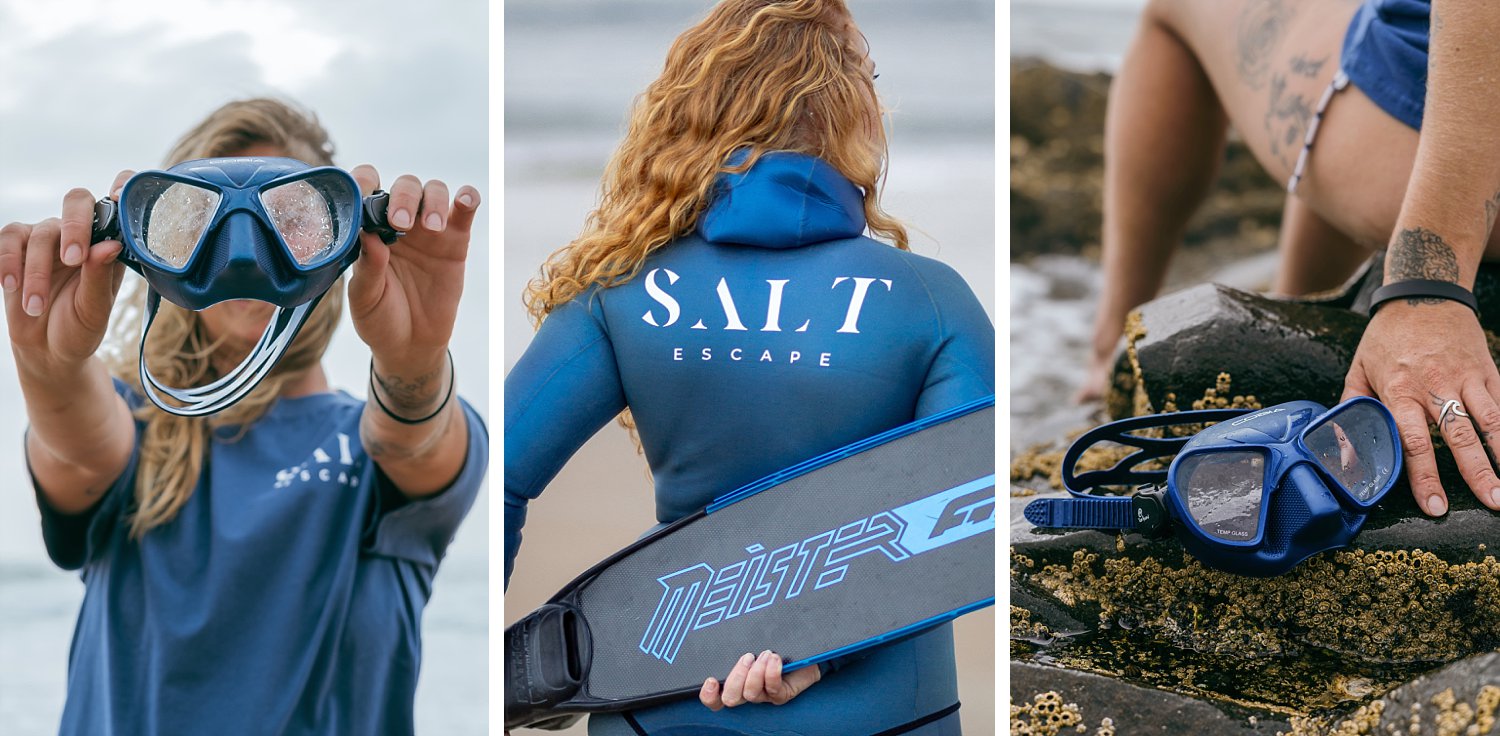
1. The Mask: Field of Vision and Comfortable Fit
First on the list for a reason, your mask is your most important piece of your freediving equipment to guide you in your journey. Not to be confused with “goggles”, which are for swimming and don’t cover the nose, a freediving mask is your window in the water.
When choosing a mask for freediving, you want to look for something that is “low profile“ or “low volume”, meaning the mask sits very close to your face. This is so you have a very small amount of air in the mask, an important point, because when freedivers start to go deeper, they will find they need to equalise their mask. Using less air for equalisation of the mask means you have more air for yourself.
It is also better for masks to have clear lenses as opposed to colored or mirrored lenses, so that your buddy can clearly see your eyes while diving. This is to watch out for any oncoming signs of a black out which you learn about in your Beginner Freediving Course. Flat lenses or curved lenses are up to the preference of the freediver. Flat lenses give a truer field of vision, while curved lenses improve peripheral vision, but slightly distort the field of vision. If adventure diving is more your style, a curved lens allows you to see more of the action around you.
When you purchase a mask with glass lenses, make sure to read the manufacturer label on your mask before the first use, as some masks come with an anti-fog layer. If there is no anti-fog layer, wash the inside of the mask lens with shampoo or toothpaste to remove the protective film. Burning mask lenses are a thing of the past! Plastic lenses do not have a protective film, but you need to be extra careful because plastic is highly prone to scratches; keep them in the box when you are not using them!
Another point to take into consideration, is to make sure you find a mask that fits you. Overall, the mask needs to be comfortable for you!
Check for a good fit by:
1. Folding the strap of the mask to the front and out of your way.
2. Placing the mask on your face without wiggling or pushing.
3. Softly inhale through your nose and if the mask sticks to your face, it is a good fit.
4. Don’t forget to make sure that you can equalize with the mask on.
2. The Snorkel: Keep It Simple
Whether you are resting on the surface preparing for your next dive, or training with your buddy in the pool as safety, with a mask comes a snorkel.
Your snorkel can be attached to your mask with a small plastic attachment piece, or simply slide it under your mask strap. The benefit of having it under the strap, means that it can be easily removed before your dive to reduce any unnecessary drag. If that’s your style, make sure you choose a snorkel that floats!
Freediving snorkels don’t need valves or extra features. In fact, simpler is better. A plain, flexible snorkel without purge valves is ideal because it’s less likely to trap air or create drag. Ideally, you want a snorkel that is a solid design that doesn’t allow the mouth piece to be detached. Over time and with use, the seal between the mouth piece and the length of the snorkel can become loose. When this happens, water may tend to leak in and this is uncomfortable when breathing on the surface.
Look for:
– A comfortable mouthpiece that doesn’t strain your jaw.
– A solid single design that won’t separate and leak.
Pro Tip: Remove your snorkel from your mouth when underwater so that you don’t swallow water when returning to the surface.
3. Fins: Efficiency Is Everything
Freediving fins are a key element in your range of gear. But it’s not as simple as going for the longest ones you can find. There are different types of blades and different uses for each type too. The idyllic images of streamlined bodies with elongated blades are only for aesthetic purposes.
There are 4 different types of blade for the freediving fins:
– Silicone
– Plastic
– Carbon Fiber
– Fiberglass
You definitely don’t need to start with the fancy fiberglass or carbon fiber fins because those are for more advanced and deeper dives. As a novice freediver they are, in general, three times more expensive than the silicone and plastic options. They’re also a lot more fragile and it’s often best to learn and develop efficient techniques before investing. Only consider spoiling yourself with carbon fiber or fiberglass fins after your Advanced Freediver course.
Start training with plastic or silicone fins to work on forming good technique. While plastic fins are cheaper and more durable, they can be stiff, which is not beneficial for forming good technique. Once a freediver is ready for a more premium pair of fins, they can look to purchase fiberglass or carbon fiber fins.
Fiberglass and carbon fiber fins come in different blade stiffness’s, but are often a bit more difficult for beginners to use as they require good ankle flexibility. Soft bi-fins are recommended to save energy, minimize oxygen consumption, and improve technique. Pool training: Short or medium-length fins are great for controlled drills and techniques.
Beginners: Silicone or plastic long fins provide durability and help build foundational finning skills.
Advanced divers: Fiberglass or carbon fins give more power with less effort, ideal for depth and longer dives.
What matters most is the fit of your foot pockets and how natural your kick feels. If your ankles hurt or your kick feels forced, your fins are probably too stiff or the pockets are too tight.
Pro Tip: Avoid pushing off of a pool wall or floor with your carbon fins and don’t leave them in direct sunlight.
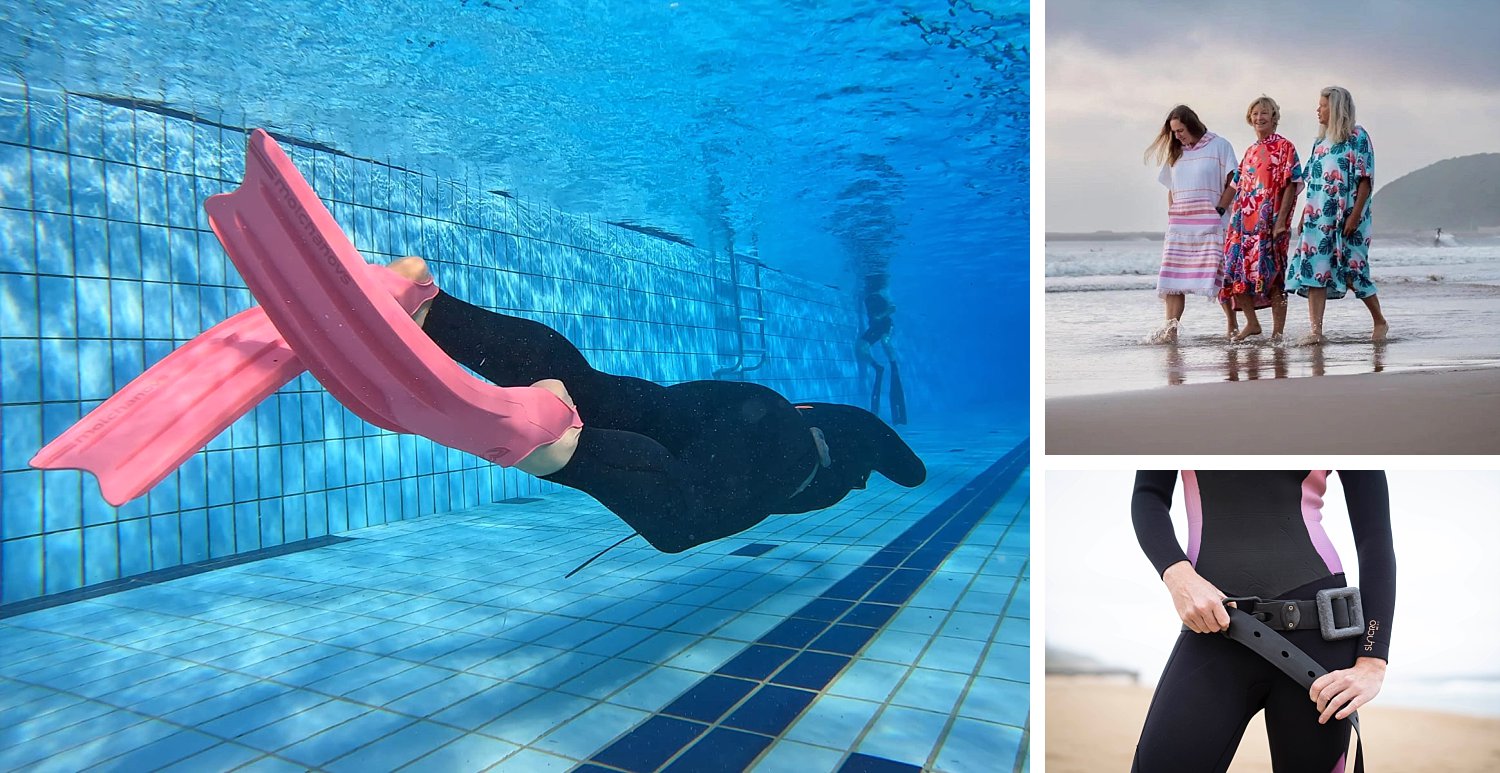
4. Wetsuits: Warmth and Freedom of Movement
A must have item in our freediving equipment guide, is a wetsuit. A good freediving wetsuit should feel like a second skin.. snug, but never restrictive.
Remember to take into account that a wetsuit that is too tight will restrict breathing, while a wetsuit that is too loose will flood with water and provide less thermal insulation. A hood is also beneficial for freedivers as it reduces loss of body heat through the head and provides sun protection for the head and neck.
Your wetsuit won’t just keep you warm in the water, it also protects freedivers from the sun and stinging organisms in the water like bluebottles or jellyfish.
Warm pools or tropical water: 1.5 to 3 mm suits or even thin surf suits work well.
Colder conditions: Look for open-cell neoprene or smooth skin for maximum warmth and stretch.
Pro Tip: If you’re between sizes, choose the one that feels snug, neoprene loosens slightly in water.
5. Weights and Weight Belts: Balance and Safety
Weight belts for freediving should be made of rubber or silicone, unlike the nylon belts used in scuba diving. Rubber belts are more elastic and are tightly stretched across the hips so that the belt doesn’t slide when diving. They also stay tight even as the wetsuit compresses with depth. Marseille (also called pin) buckles are considered the most reliable for their quick-release.
A rubber freediving belt with evenly distributed weights helps you fine-tune buoyancy. The goal is to be positively buoyant at the surface and neutral at 10m. You can test your buoyancy for depth with a surface exhale test under the supervision of your instructor.
To test your buoyancy:
1. Allow your lungs to deflate with a passive exhale (don’t force the air out)
2. Hold your breath on this exhale, relax your body (without kicking)
3. Check that you are not sinking. Your head may bob underwater, but you should not sink any further. If you sink further, grab the float or use your fins to come back to the surface, remove some weight, and repeat this test until you are no longer sinking.
The lead weights also come in two different styles: H Block and D Weights. What you use comes down to personal preference. H-block weights are threaded though the belt and can easily be added or removed when diving with different set ups. For example, you would use less weights for your pool training than in the ocean. While the D weight is designed to sit closer to the body, is less bulky and can be fixed into place. Using D weights just means that when they are fitted in place, it’s generally difficult to get them off.
6. The Extras That Make Life Easier
A few simple accessories can make a big difference in comfort and convenience:
Changing mats to keep your wetsuit separate from your dry gear.
Towel ponchos for quick warmth and drying off after a dive.
Durable dive bags to keep gear organized.
The Bottom Line
Freediving equipment should support and guide your body, not compensate for your skill. Start with what you have, refine your technique and upgrade slowly as your diving evolves.
You don’t need fancy gear to find peace beneath the surface. You need patience, presence, and a setup that helps you feel safe, relaxed and free.
Download the full Freediving Equipment Guide (PDF) for side-by-side gear recommendations for pool, beginner, and advanced divers.
Need help choosing or fitting your gear? Reach out to us on info@saltescape.co.za or join a SALT Escape private coaching session.


